If your checking skills have gotten rusty, don’t worry. Here’s what you need to know about endorsing and cashing a check.
Electronic payment apps have exploded in popularity in recent years, but tried-and-true payment methods have not disappeared. (For proof, look no further than that birthday check you receive in the mail every year.)
Checks might not be as common as they were in decades past, but they’re still a fairly routine form of payment. According to a recent survey from the Federal Reserve Bank of Atlanta, 2.7% of all transactions are still paid by physical check. While that might not seem like a lot, 40% of all consumers used a check in the 30 days prior to the survey.
How do you endorse a check?
When you receive a check, you need to sign it in order to deposit it at your bank or cash it. Flip your check over and look for instructions that read “endorse here” or something similar. Signing your name will allow the bank to process it.
Now, here is everything you need to know about endorsing a check. Next time you receive one, you’ll know exactly what you need to do to deposit it safely.
-
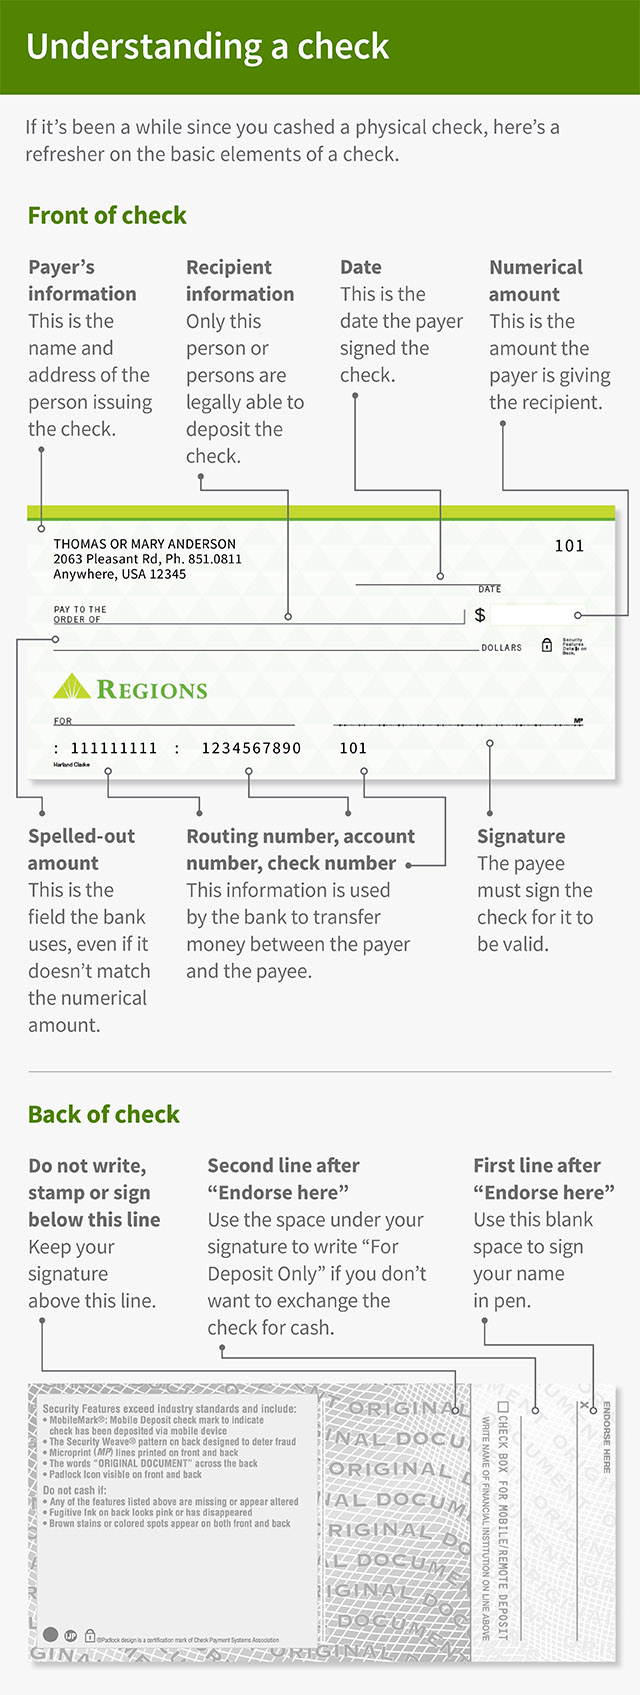
Look at the written and numerical amounts.
Most of us tend to look at the numerical amount on a check, but you should also carefully read the spelled-out amount. If the two don’t match, the amount spelled out is what your bank considers final, according to the Consumer Financial Protection Bureau.
-
Make sure the check is signed.
This part is important but easily overlooked: If the person who wrote the check forgot to sign it, your bank won’t accept it. If the signature line is blank, you’ll have to ask the payer to sign the current check or mail a new one.
-
See who the check is made out to.
Just because someone handed you a check doesn’t mean you’re legally able to deposit it. If it’s made out to another person, or if this field is left blank, the check will bounce. Little details matter, too. If the check includes “and” (such as “Melissa and Sam Jones”), both people will need to endorse the check. On the other hand, if it’s written to “Melissa or Sam Jones,” either person can sign.
-
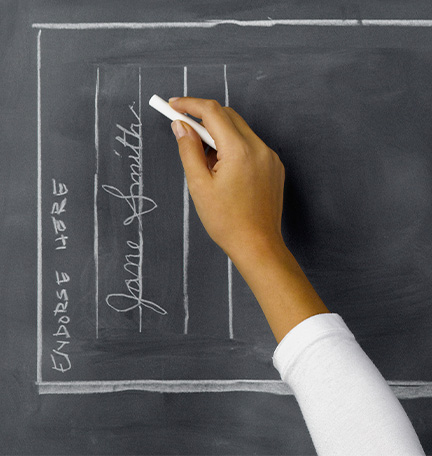
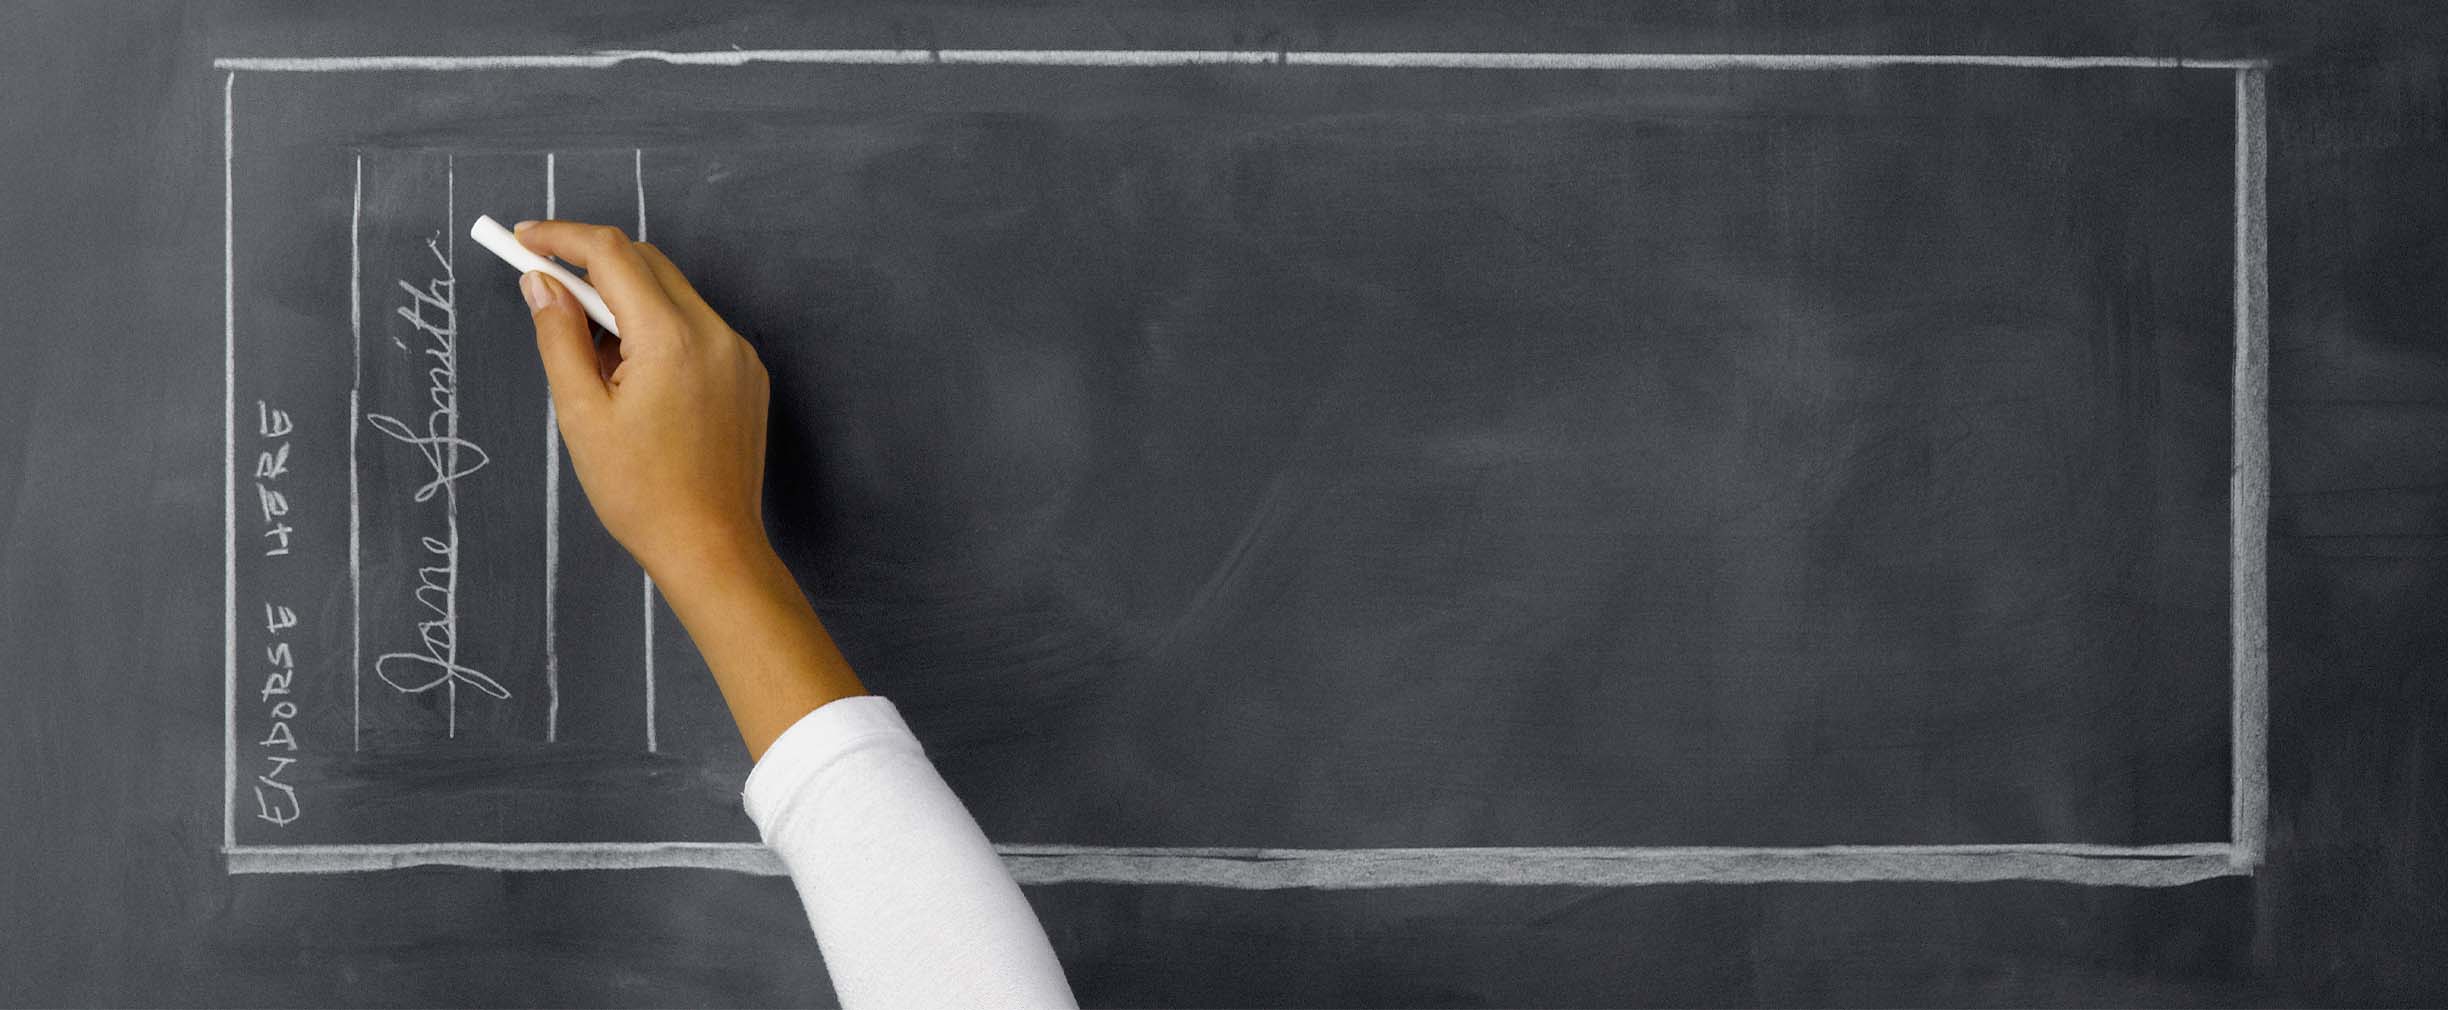
Endorse the check.
After you’ve looked over the above fields, it’s time to get out your pen. And make sure it is a pen—not a pencil. On the back side of the check, you’ll see a box with the heading “Endorse here,” followed by a blank space, and then text reading “Do not write, stamp or sign below this line.” Sign your name in cursive in the blank space.
-
Know your endorsement options.
While it’s totally acceptable to simply sign your name on the back of the check—this is called a blank endorsement—be aware that you have other options. For an added layer of security, you can write “For Deposit Only” under your signed name. With this option, the bank teller will only deposit the check amount into your bank account; they will not exchange the check for cash. If you’re using mobile deposit on your bank’s app, your bank might require you to write “For Mobile Deposit.” Ask your bank if this is a requirement.
-
Deposit or cash the check.
After you’ve endorsed the check, you can either deposit it or cash it at your local bank branch. If you just want to deposit it, you can also use your bank’s mobile deposit app or mail the check to your bank.
That’s all there is to it. So the next time you get a refund check or a gift from a relative, you’ll know exactly what to do.
Start today
- Read more: 5 checking account mistakes to avoid.
- Learn more: Review your options for personal checking accounts.
- Take action: Download the Regions mobile banking app.